


A Modern Man’s Tutorial on How to Sew a Button

You’re just about to head out the door when a button pops off your shirt. Now what? Sure, you could just change shirts, but whether you take care of it now or later, knowing how to sew on a button is one of those essential life-skills that every man should know how to do. And sometimes, you just really want to wear that shirt.
Supplies
You’ll need some thread — preferably a color matching the one used on the other buttons — a needle, scissors or something to cut the thread with, and, of course, a button. Ideally, you’d use the one that just came off your shirt, but if that bounced somewhere unknown, never to be seen again, you can use one of the extra buttons attached to the inside of most shirts.
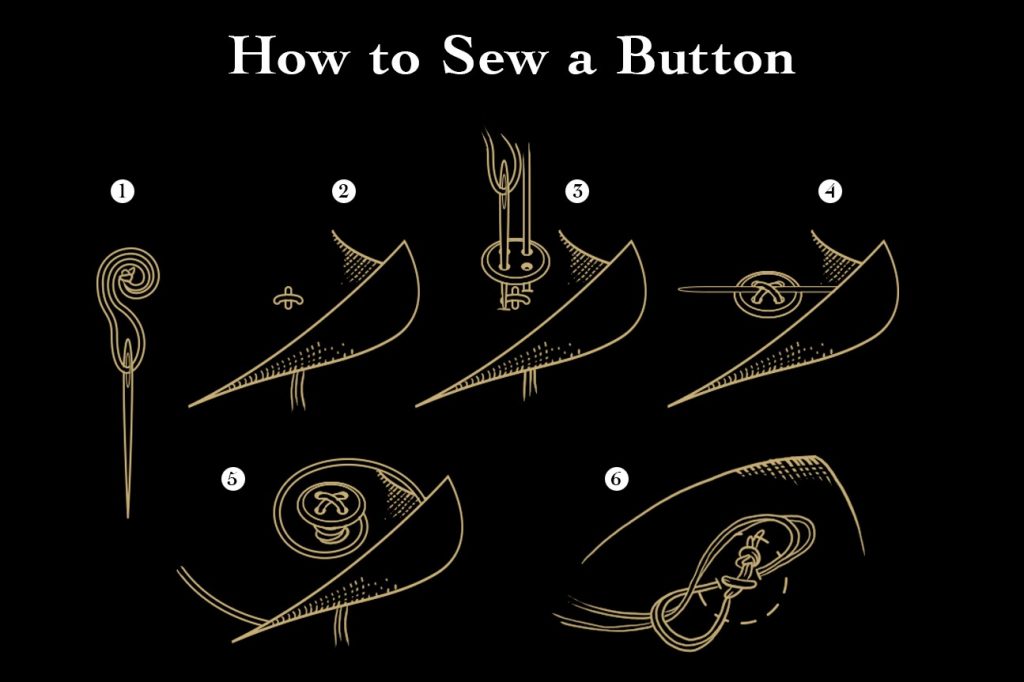
1. Thread the needle.
Cut off about two feet worth of thread. Wet one end in your mouth and thread it through the eye of the needle, then double it over so you have about a foot of doubled thread. Knot one end of the thread.
2. X marks the spot.
Put the needle through the back of the fabric where you want the button to be; pull it and the thread all the way through, then move down slightly and push it back in again, front to back. Repeat this step several times until you have created an X. This will be the anchor of where your button will go.
3. Choose your pattern.
Most shirt buttons have four holes. Take a look at the pattern used for the other buttons on the garment. The thread may be straight across, or it may be diagonal. Follow the same pattern as you bring the needle through the back of the fabric, up through one of the button holes, then back down and through another hole. Do this about three times for each hole.
4. Optional: Use a spacer.
If you have a second needle, you can use it as a spacer as you begin to sew the button on, placing the needle on top of your button and looping the thread through the button holes, over the spacer, and back down through the other holes. When you remove the spacer after your loops, you will have a little play so you can actually manipulate the button through the shirt’s buttonhole. A toothpick or wooden matchstick will work as well.
5. Create a shank.
Whether you use a spacer or not, you’ll want to wrap the thread around the back of the button about six times. This is called the shank and it, too, creates some play to allow for easy buttoning, while also securing it more firmly. Simply come up through the back of the shirt fabric once more, but instead of going through a button hole, start winding the thread around the back of the button.
6. The final knot.
After you’ve finished winding, push the needle through the fabric to the underside of the shirt, pulling the thread all the way through so you can tie it off with a knot. To create the knot, push the needle through the threads at the back to create a loop; pass the needle through the loop to create a knot. Do this twice, cut off any excess thread, and you’re done.